
Original Prusa SL1 – What to expect

Josef Prusa and Co just released the Original Prusa SL1, an Open Source SLA 3D Printer. It looks like there’s enough features to make Resin 3D Printing an even bigger deal! Let’s explore.
Prusa Research steps into a new segment of 3D Printing with it’s Prusa SL1. The resin 3D Printer segment. A new but prosperous field of 3D Printing with new benefits and challenges.
Josef Prusa is well known for being an incredible developer with a rock-solid mindset in open source and availability. With the evolution of Prusa FFF/FDM 3D Printers from Prusa Research we’ve seen technological leaps being made without locking the knowledge behind patents
The Prusa i3 are probably one of the worlds most popular 3D Printer model and it’s successor Prusa Mk2 and now Prusa Mk3 are loved by almost everyone who gets their hands on one!
For Prusa to release (aff-link)Prusa SL1, an open-source SLA 3D Printer shows that the 320+ people strong Prusa Research are serious about bringing high-tech 3D Printing to more customers without compromising on their open source mindset.
What is SLA, and why is interesting?
In short, SLA uses a UV-light source to cure select parts of a UV-sensitive resin. This resin sits in a “build tank” and have a special transparent window that the resin don’t stick very well to.
Prusa SL1 uses something called MSLA, which is a masked SLA-process.
The masking of the UV-light is made with a LCD photomask and generates an image (imagine a silhouette) of your object on this window and cures the resin in contact with the window. This process generates a cured layer.
When one layer is complete, the printer raises the build plate to allow liquid resin to seep in under the already cured resin.
When the process is repeated you can see an object “dragged” out of the resin.
A sped up time lapse tells the full story much better than I could:

Made with SLA 3D Printer (not Prusa SL1)
In my guide about choosing 3D Printing technique for beginners you can learn more about FDM, FFF, SLA, DLP and SLA.
The term SLA and DLP are heavily debatable and although the Prusa SL1 does not use a laser-based stereolithography (Laser-SLA), they’re using the masked SLA (MSLA) which goes in the SLA-category.
Why target SLA and resin 3D Printing?
Prusa SL1 aims to offer solutions and open-source ingenuity that big corporations or copy-cats cant. The resin 3D Printing market have always needed this and the company that came closest to bringing SLA 3D Printing to the market have grown into a big expensive corporation targeting anyone by individuals.
The Prusa Research ability to openly share the reasoning behind implemented features (and rejected) allows the team, with partners like Futur3D to actually create a printer that looks great on the paper. Hopefully we’ll be able to test one further down the line as well.
The drawbacks with SLA – And how to solve them
The information we’ve seen so far already shows that the Prusa SL1 attacks the important drawbacks of using resin in a very interesting and innovative way.
Resin is smelly, sticky and require precision. Finished models needs cleaning, washing and curing to look great and hold up for actual use.
Let’s look at a few features Prusa have already implemented in Prusa SL1 that makes SLA 3D Printing easier:
Motorized Tilting bed

The transparent window between the Resin tank and build plate is called a FEP Film. It’s job is to allow UV-light through to cure the liquid resin without sticking to the film. This is hard thing to do and the constant wear on the paper will make the resin stick more and more.
To safely separate the cured resin (attached on the build plate) without deforming it or breaking parts you want to introduce another motion.
Prusa SL1 solves this by tilting the bed, creating a separation from the side. Peeling something of from the side allows less force although it takes a bit longer. It’s still the best way to get parts of from the bed with minimal risk of errors.
A bonus is that the Prusa SL1’s tilt motion also helps stir the resin, keeping it well mixed.
Aluminium Resin Tank with Flexible FEP Film

To contain the resin, you need a resin tank. Prusa SL1 uses a rigid tank that’s easy to remove for calibration, cleaning, pouring out resin or just maintenance.
The FEP Film is flexible to make sure that in a catastrophic failure, where a model sticks to well, you won’t break the film (creating a very bad and messy leak) but only deform it.
These FEP films are usually very easy to remove by stretching it underneath with a frame that’s Tensioned by a few screws. Most FEP films in other machines need changing after around 2-10 liters of Resin used.
Automatic Calibration

The automated build plate leveling in the Prusa SL1 is simple but ingenious. It works by un-tensioning the top screws loosing a ball joint. The plate is then lowered until the whole build plate rotates and sit flush to the resin tank’s bottom.
When it’s completely parallel to the resin tank you tighten the screws and you’re ready to print!
Ball Screw Z-axis

Resin printers usually only have one moving axis. The Z-axis. But of course, the tiling resin tank is also moving, but require less precision.
The precision of the Z-axis makes up for more or less all the precision in your 3D print. If it’s not accurate and precise, you end up with wobbling layers and uneven X/Y accuracy. The Z-axis is incredible important and I’m very happy the Prusa SL1 uses an excellent Ball Screw Z-axis!
Resin Sensor
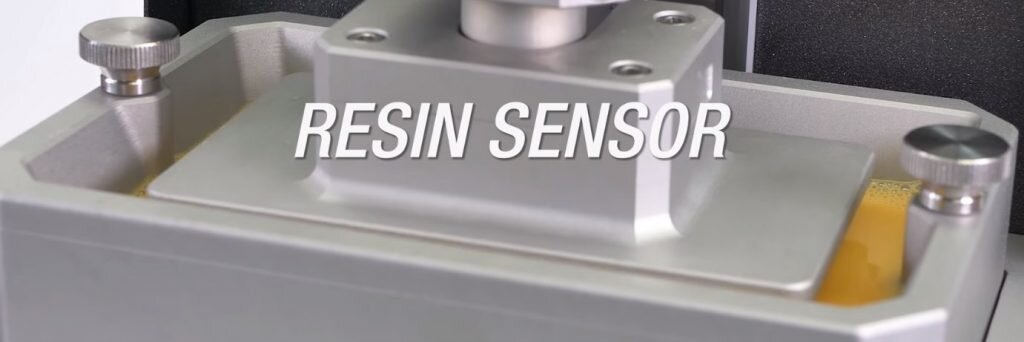
This is a feature not seen on many resin printers. Having to guess how much resin you have left or have prints fail due to low resin is incredible frustrating and I’m happy SL1 solves this!
The resin sensor on Prusa SL1 pauses whenever a refill is needed so you don’t need to calculate and risk overfilling before a print.
With open source and an ingenious community it’s only a matter of time before someone makes a automatic refill as well.
More features we’re looking to learn more about!

In the Prusa SL1 introduction video from Prusa Research we see features like Power Panic and Vapor extraction. These are super interesting and adds great usability to the Prusa SL1.
Power Panic should be similar to the Prusa Mk3’s feature where a power outages won’t ruin your print. The machine simply stores the progress in it’s memory and you can resume as soon as you have power.
Vapor Extraction is really interesting as most resins (unsure about Prusa’s own resins, if those exist) have irritating and sometimes toxic fumes associated. The Vapor extraction system on Prusa SL1 also keeps the machine cooled and well ventilated through a single exhaust in the back.
The air goes through a filter, and although we’re not sure what type of filter it is, we’re sure that it helps filtering the fumes at least a bit. If not completely, you can hook up a hose and extract the fumes through a window or similar.
I’m sure the community won’t have any problems coming up with smart solutions to minimize vapor and smell even further!
With Prusas track record I’m sure we’ll see great addons and features being implemented in the future!
Wash and Cure machine!

With the Prusa SL1 introduction, we’re also teased with a complete Curing and Washing machine.
This is really awesome as it helps eliminate the sticky and messy handling of resin prints after the print. You still need to remove models from the build plate of course, but having a machine wash them for you in isopropanol (isopropyl alcohol) saves user-time a lot!
The UV-cuing station that rotates your models for best expose is just fantastic. You won’t believe how much time this saves compared to other machines that lack it.
The technical specifications of Prusa SL1
Construction: Rigid dural frame with a separate body.
LCD: 5.5″ LCD Display with 2560×1440 pixels.
Build Volume: 120x68x150mm (or 4.7 × 2.6 × 5.9 in.).
X/Y Resolution: 0.047mm.
Z Resolution: 0.01mm (0.025-0.100 recommended) – Allows for variable layer height.
Third Part resins: Yes!
Print Speed: 6 second layer curing, independent of objects/printing area. Different resins will affect print times.
Resin Sensor: Senses when resin runs low and pause/notify the user.
Build Tank type: FEP film
Separation mechanism: Tilting motion of Build Tank
Stepper drivers: Trinamic drivers for silent operation
Interface: LCD Touchscreen
Connectivity: LAN, Wifi and USB.
Software: Slic3r PE
Other Features: Panic Mode, Vapor Extraction, Protective membrane (for spills), easily removable build platform and much more.
Prusa SL1 Software
Prusa’s main goal is open-source hardware that’s good, really good! Prusa will expand their Slic3r PE to integrate SLA Slicing directly, but of course open up for third party developments of even more exciting features over time.
There’s not much more released today but I hope SLA-support-structures and algoritms for resin 3D Printing will be integrated in Slic3r PE. Those things are usually the most difficult to get right (that you as an user is responsible for).
Availability and shipping
For the features, the price of Prusa SL1 is fairly well placed, towards the higher side. The competition have options both higher and lower, but non really offer the complete feature list that Prusa SL1 do. I’m hoping there’s room in the price for Prusa to work with resellers, as resin 3D printing can be a bit more tricky to master and having local repairs and service providers representing them could be ensuring.
The Prusa SL1 Pre-assemble can be ordered for 1.999 USD here (aff-link).
This machine is now shipping asap - but some lead time may be expected, read at the link above.